
- Tap the settings icon in the bottom-right corner of the conversation screen.
- Open the Audio tab.
- Choose the microphone from the list at the top. Default lets the app choose.
Active audio source, under the list, shows the microphone the app is actually listening to. Check it when captions don't appear. If the microphone you chose isn't connected, for example when glasses are asleep or a headset is switched off, the app doesn't switch to another one by itself: connect it again, or choose Default, then start a new conversation.
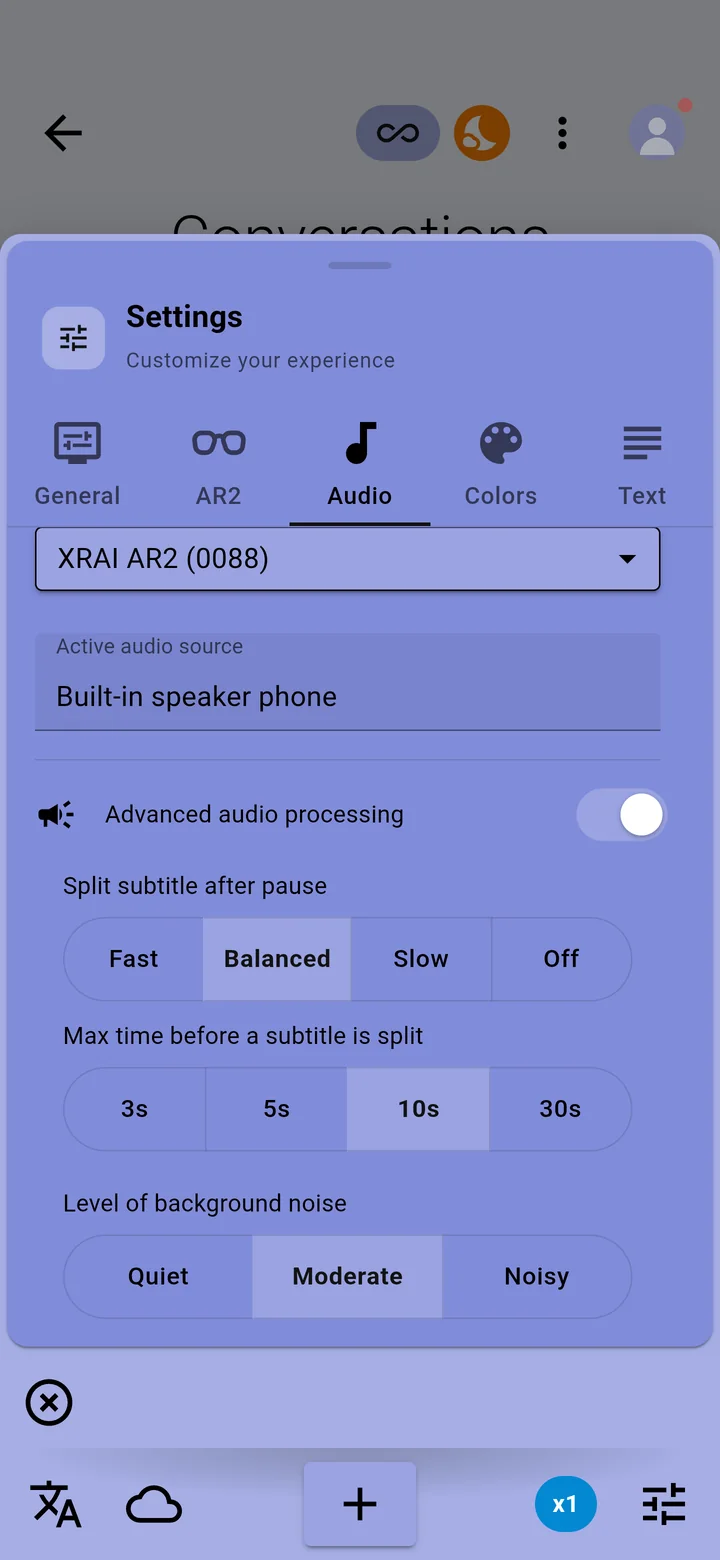
Microphones you can choose
- Your phone or tablet's own microphone
- A Bluetooth or USB microphone or headset. Pair a Bluetooth microphone in your phone's Bluetooth settings first; it then appears in the list.
- AR2 Glasses. The microphones in your XRAI AR2, shown by the glasses' name while they are connected.
- System Audio (Mac with macOS 14.2 or later). Captions what your Mac is playing, such as a video call or a film.
Other audio settings
- Advanced audio processing cleans up the sound before it is captioned.
- Level of background noise: choose Quiet, Moderate or Noisy to match where you are.
- Split subtitle after pause and Max time before a subtitle is split set how soon a new caption line starts.
A microphone close to the person speaking gives the most accurate captions. See Getting the most accurate captions.